Installation of Pacifist is simple - just drag and drop the “Pacifist” folder to your Applications folder (or wherever you’d like to keep it). To uninstall, simply drag Pacifist’s folder to the Trash.
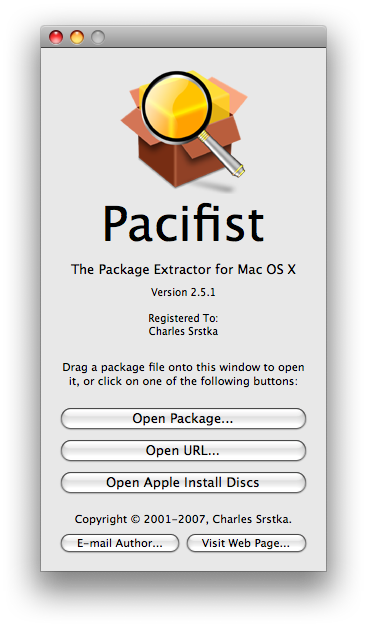
When you first launch Pacifist, you will see the main window, which is shown in the picture to the right. In addition to displaying information about Pacifist, such as its version number and registration status, this window allows you to get started with Pacifist by opening a package.
If the file you need to extract is one of the files that is pre-installed with Mac OS X, such as the Mail or iChat application, the easiest way to open the package you need is to insert your Mac OS X Install CD or DVD (insert disk 1 if you have a multi-disc set) and click the “Open Apple Install Discs” button. Pacifist will conveniently open all of the install packages into one window for you.
Note: the “Open Apple Install Discs” button will be disabled if an Apple install disc is not inserted in your computer. In this case, simply insert the Mac OS X Install CD or DVD, and the button should become enabled.
If you want to open a package other than the OS install packages, the easiest way to do so is to drag the package’s icon over the main window itself. If you like, you can also click the “Open Package...” button, which will bring up an Open dialog box from which you can select a package to open. You can also use this method to open the OS install packages if you prefer. If you would like to open the install packages manually, they are usually found in System/Installation/Packages/ on the install disc. You may also use the “Open URL...” button, which will allow you to enter a URL to a package, disk image, or Zip archive on the World Wide Web.
Additionally, the “Open Apple Install Discs” button is able to open some Apple install discs other than the OS X install disc,
such as the iLife or iWork installers. If you encounter an Apple-provided install disc that does not work with the
“Open Apple Install Discs” button, please send me an e-mail at
so that I can correct this.
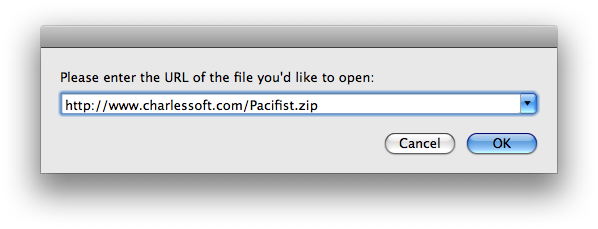
A new feature in Pacifist 2.5 is the ability to open a file by URL. Just enter the URL to a file located on the Internet, and Pacifist will open it directly, eliminating the need for you to download the file manually and then throw it away later. Additionally, if the URL you enter is to a .pkg package, a .zip archive, or a .dmg disk image, Pacifist will download only the parts of the file that are needed to open it, allowing you to view very large packages and archives extremely quickly, without the need to wait for a time-consuming download to complete.
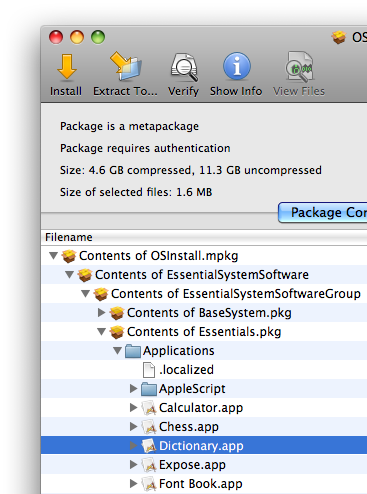
Once you open a package with Pacifist, you need to locate the files, folders, or applications that you want to extract from the package. If you want to look inside a folder, you can click the small triangle to its left, and you will see its contents. Once you find the files you want to install, you can select them by clicking on them, as in the picture to the right.
Note: if you have trouble finding the app you want, you can search for it by using the “Find” search field that appears at the top of every document window in Pacifist.
If you would like to extract or install the entire contents of a package, you can do that by selecting the “Package Contents” item that appears at the top of the package’s file listing.
Once you have located the files, you can install them by doing one of the following:
When you start the extraction, you may be prompted for an administrator password if the package is set to require authentication. If this occurs, simply type the name and password of an administrator to continue. If you would like, you can override this setting by unchecking the “Use Administrator Privileges” check box when asked to confirm the extraction, although this may cause the permissions of the extracted files to be incorrect. Also, if you are extracting or installing a file into a folder for which the currently logged-in user does not have write access, unchecking the “Use Administrator Privileges” check box will cause the extraction to fail.
Occasionally, Pacifist may find that a file it is installing already exists on the hard disk. If this is the case, Pacifist will, by default, present you with an alert panel asking you whether to replace the file on the hard disk with the one from the package and proceed, leave the file on the hard disk alone, or stop the installation.
If the file to be replaced is an application, the options are slightly different. The choices to leave the existing file alone and to stop the installation remain, but in the place of the single “Replace” option there are two options: “Replace” and “Update”. The default is Update. The reason for this is that most applications in Mac OS X are actually folders called “bundles” which contain many different files that are used by the application. The Update option will install these files, replacing ones that already exist and leaving all other files in the application alone. The Replace option, on the other hand, will delete the existing application bundle altogether and install the files from the package in its place. Be careful when using the “Replace” option, as it can render an application unable to launch if the replacement application is not a full installation of that application (for example, if you are installing from an update package rather than a full install).
Note: the Replace option should only be used on full install packages. When installing applications from update packages or language packages (see below), you should always use the Update option. In fact, since the Update option will be sufficient for most purposes, you should always use it unless you have a specific reason to delete the existing application bundle - for example, if you want to downgrade an application to an older version for which you have a full install package.
In many of these alert panels that asks you to make a decision about something, a check box entitled “Don’t ask again for this installation” may appear. Checking this box will cause the decision you make to automatically apply in any future situations during the installation where the alert panel would normally appear. For example, checking this box and then clicking “Update” would cause Pacifist to automatically choose “Update” for any other applications that already exist instead of asking you.
When working with the OS Install packages, you may encounter several language packages with names such as French.pkg, German.pkg, etc. inside the “LanguageTranslations” (or “Languages.mpkg”) package. These packages do not contain all the files necessary for the applications contained inside them to run, but they can be used to add support for a language to an application. To do this, first verify that the application itself is installed on your hard drive. Next, select the application you wish to update in the language package and install it as usual, being sure to click “Update” when asked whether to update or replace the existing application.
Pacifist can verify existing installations, checking the files on your hard disk and seeing how they compare to the files listed in the package, and notifying you of missing files as well as files that have different permissions or checksums than those listed in the package.
To verify an installation, first open the package or receipt containing the files you want to verify. Select the files you would like to verify, or the “Package Contents” item if you would like to verify the entire package. Next, choose “Verify Files...” from the File menu. This will cause the following panel to appear:

The files will always be checked to ensure that they exist on the hard disk. However, you also have the following options:
When you start the verification, you will be prompted for an administrator password. Simply type the name and password of an administrator to continue. After you enter a valid administrator password, Pacifist will verify the files and will afterward present you with a report listing the files that were scanned as well as which ones showed differences from the files in the package. This report can be printed or saved to your hard disk.
To take a quick look at the kernel extensions installed on your system, choose “Display Kernel Extension Report” from the Pacifist menu. After Pacifist finishes scanning your receipts, you will see a window similar to below:
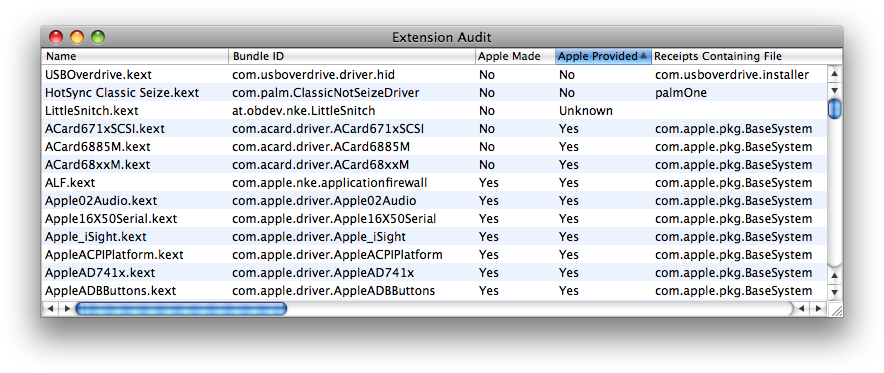
The first two columns display the kernel extension’s name and bundle ID. The “Apple Made” column shows whether the extension was made by Apple according to its bundle ID, and the “Apple Provided” column shows whether the kernel extension was found in any Apple-provided receipt. If either of these two columns displays “Yes”, there is a good chance that the kernel extension is an important part of the operating system and should not be removed. If an extension is neither made nor provided by Apple, it is most likely part of a third-party program. If the extension was installed by a standard package installer, the name of the package that installed it will appear in the “Receipts Containing File” column. If you suspect that a third-party kernel extension is causing problems on your system, you should check to see if the application includes an uninstaller. In most cases, an uninstaller will be installed along with the application.
In the example above, there are three non-standard kernel extensions present on the system. Two of them, USBOverdrive.kext and HotSync Classic Seize.kext, were installed by third-party .pkg installers, so the right-hand column shows that they were installed by the USB Overdrive and PalmOne installers respectively. The third kernel extension, LittleSnitch.kext, however, was not found in any receipt package, so it is impossible to determine exactly where it came from. In most cases, this is because an application used a non-standard installer type such as Installer VISE instead of a standard .pkg installer to install the kernel extension. However, in this case, the company from whom the kernel extension came can often be found by looking at the extension’s bundle ID. The bundle ID usually begins with the company’s web site, with the parts that are separated by a period in reverse order. For example, a kernel extension made by Apple would start with “com.apple”, since Apple’s web site domain is http://apple.com. In this example above, the bundle ID for LittleSnitch.kext has the bundle ID “at.obdev.nke.LittleSnitch”, which starts with “at.obdev”. This means that it was probably provided by the company whose web site is http://obdev.at/, which turns out to be Objective Development, the makers of Little Snitch (who really should be using the standard package format!).
NOTE: The “Display Kernel Extension Report” feature will only work if all the Apple receipts are present in the /Library/Receipts folder. If these have been deleted or are otherwise missing, it will not be possible to search them for kernel extensions, and all of the Apple-provided kernel extensions will show up with “Unknown” in the “Apple Provided” column. If this occurs and you see a large number of kernel extensions marked “Unknown”, do not delete the kernel extensions, because deleting Apple-provided kernel extensions could cause your system not to function.
Updating prebinding information was once a useful way to optimize application launch times on Mac OS X 10.1 and earlier. It is no longer necessary on Mac OS X 10.4 “Tiger” and later, and it is not as necessary on Mac OS X 10.2 “Jaguar” and later as it was in earlier versions, but the feature remains for those who might need to use it to solve certain rare problems. Under most circumstances, it is not necessary to use this feature.
To update the prebinding information for the entire system, choose “Update Prebinding for Entire System...” from the Prebinding menu. If you are running Mac OS X 10.3.9 or earlier, you can also update the prebinding information for just the files in a specific folder by choosing “Update Prebinding for Folder...” from the Prebinding menu.
When you choose to update the prebinding, you will see the following panel:

If the “Force all files to be re-prebound” box is checked, Pacifist will redo the prebinding information for every prebindable binary file on your hard disk, including files that already have up-to-date prebinding information. This will increase the time necessary to prebind the files considerably, but can sometimes be helpful in solving problems caused by incorrect prebinding information. If this box is unchecked, Pacifist will search your hard disk for binary files that have missing or out-of-date prebinding information and update the prebinding for those files.
When you start the prebinding update, you will be prompted for an administrator password. Simply type the name and password of an administrator to continue.
After you enter a valid administrator password, the prebinding update will start. Under versions of Mac OS X earlier than 10.4, this process usually takes several minutes.